The Testing Center allows instructors to schedule their exams via the Testing Center website.
Step One:
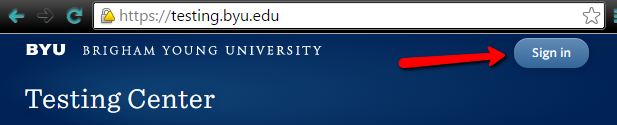
Go to the Testing Center website at testing.byu.edu and sign in.
Step Two:
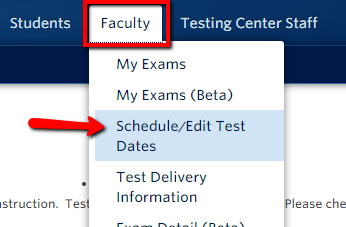
Click on the Faculty tab and select Schedule/Edit Test Dates.
Step Three:
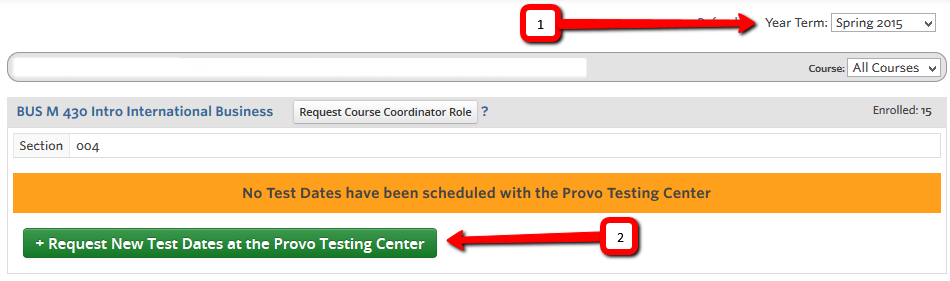
Make sure that the correct term is selected from the year term drop down [1]. Find the desired course from the list and click + Request New Test Dates at the Provo Testing Center [2].
Step Four:
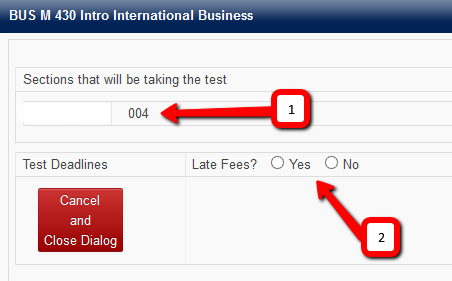
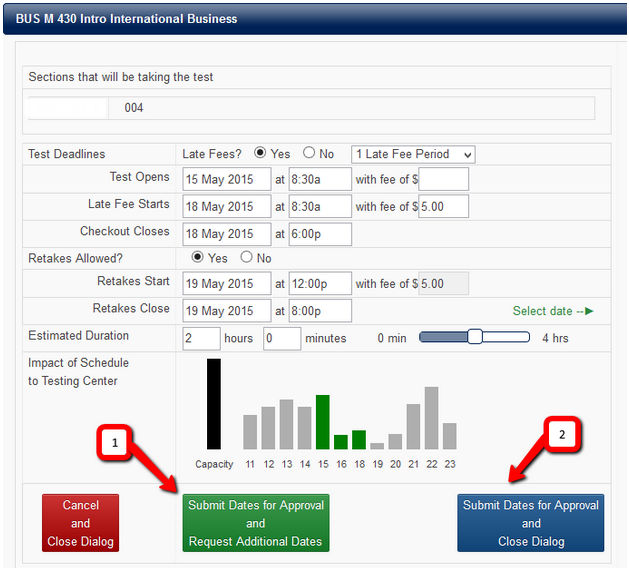
A dialog window appears. View the sections that will be taking the test [1]. Choose Yes or No for late fees [2].
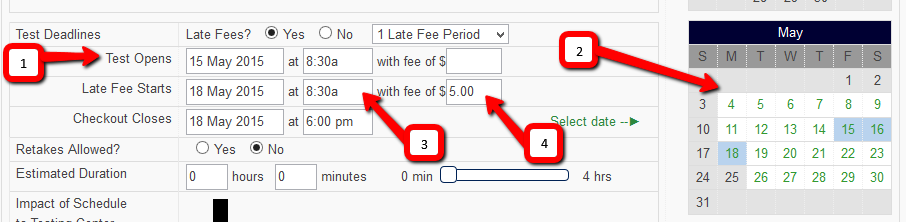
Step Five:
The window adjusts according to your selection.
If Yes was selected:
-
Select 1 Late Fee Period or 2 Late Fee Periods from the drop down menu that appears.

-
Enter open, late fee start, and checkout dates into the appropriate entry boxes [1] or use the calendar on the right hand side of the window [2] to select days.
-
Enter the start and checkout times [3].
-
If desired, enter a fee [4].
If No was selected:
-
Enter open and checkout dates into appropriate entry boxes [1] or use the calendar on the right hand side of the window [2] to select days. Enter the start and checkout times [3]. If desired, enter a fee that will apply to anyone who takes the test regardless of date or time [4].
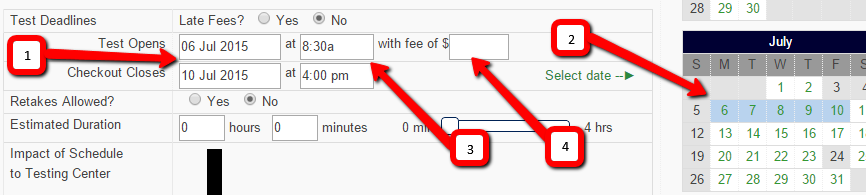
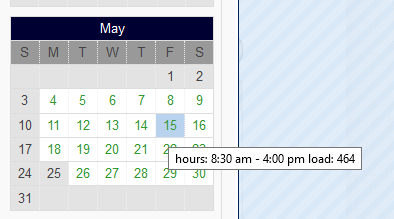
Note: Hover your mouse over a day in the calendar on the right to view a popup that displays the Testing Center hours and the current test load for that day.
Step Six:
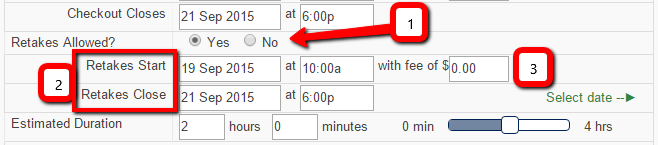
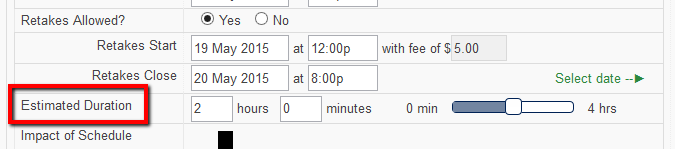
Choose Yes or No for retakes [1].
Enter in or select the start and close dates and times for retakes if yes was chosen [2].
If desired, enter a fee that will apply to anyone who retakes the test [3].
Note: Students must take the test once during the regular testing period to be eligible to take it during the retake period.
Step Seven:
Enter an estimation of how long students will take to complete the test.
Note: This estimation is used to gauge the impact the test will have on the Testing Center. The time entered will not be displayed to students and is not associated with an enforced time limit.
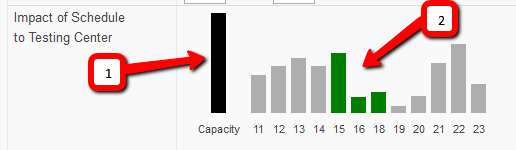
Step Eight:
View the Impact of Schedule to Testing Center. The black bar on the left [1] represents the total capacity at the Testing Center. The green bars [2] represent the dates of the test being scheduled. In the example below, the Testing Center is slightly above half capacity on the 15th.
The graph is a good indication of how busy the Testing Center is on the days shown. It is also a good indication of how likely your schedule is to be approved. Green days receive an almost automatic approval.
Step Nine:
Select Submit Dates for Approval and Request Additional Dates [1] to submit the schedule for approval but remain in the scheduling window to request additional exam dates for the current course.
Select Submit Dates for Approval and Close Dialog [2] to submit the schedule for approval and exit the window.
Tests scheduled on green days receive an almost automatic approval. It may take up to one day for approval or denial when scheduled on days other than green.
-
You will not be notified by email if the schedule was approved. Click here for more information about checking the status of your schedule.
-
You will be notified by email if the schedule was denied.
Step Ten:
The next step will be to set up the exam. Instructors can go through test setup before the schedule has been approved.
Click here for more information about test setup
Questions? Contact the OIT Service Desk (801.422.4000, it@byu.edu)